

Now that the holidays are over, you probably have a lot more time to focus on things you enjoy. So we have curated these winter craft ideas to brighten gloomy winter days and give you something fun to do. Some of them will even help you get a jump start on Valentine’s Day.
1- Homemade snowflake soap
This winter craft idea is not only fun to do, but you can create something really beautiful and luxurious to use every day.
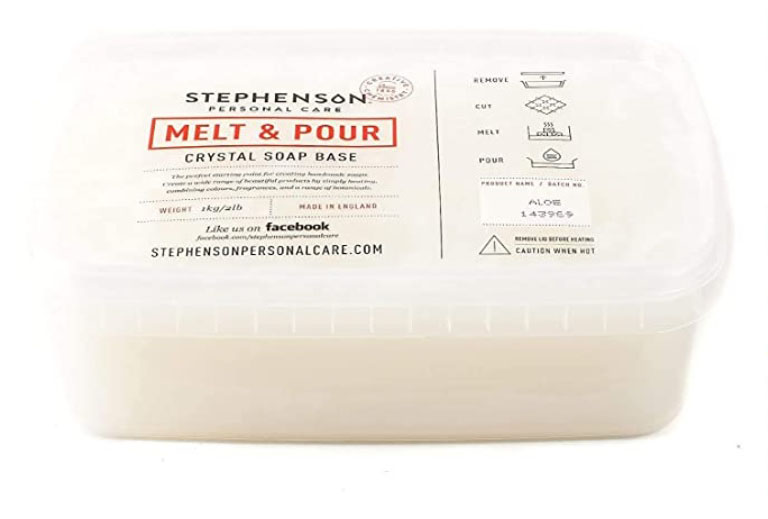
The best way to make your own soap, especially if you are new to soap making, is to use melt and pour soap. This is because to be effective, soap needs to contain lye. However, lye can burn the skin and even corrode things like metal, plastic, paint and cloth. If you get the lye wet, it’s even more dangerous. When mixed with water, it can cause a fire. Melt and pour soap does contain lye, but the manufacturers incorporate the lye at the potentially dangerous point. That means you leave the risky part to them and you can do the fun, creative part.
To make the soap, you will need:
- 1 pound of clear melt and pour soap; there are lots of types available on Amazon.
- Snowflake soap molds. You can also use an ice cube tray.
- 1 teaspoon coconut oil.
- 10 drops of essential oils in any fragrance you like. Scents like pinewood, bergamot, neroli and juniper are ideal scents for winter.
- 1 teaspoon mica powder- this makes the bars of soap glittery. You can buy it at Amazon, craft stores or on Etsy.
Once you have assembled these items, follow these steps to make your soaps:
- Cut the melt and pour soap into 1 inch cubes.
- Melt the soap either in a double boiler, or the microwave.
- Combine the mica powder and coconut oil in a bowl, then add to the melted soap.
- Stir your essential oils into the melted soap/mica/coconut oil mixture.
- Pour the mixture into your soap molds and allow to cool and harden. This will take about an hour.
- Pop out of the molds, wrap in plastic wrap.
- Enjoy!
Ideas to enhance your soap
This is a very flexible recipe. You can try substituting other oils for the coconut oil, and using other shapes rather than snowflakes.
Another interesting idea is to use square soap molds. Get a loofah and cut it into small pieces and put the pieces into the soap molds before you pour in the soap. When the soap hardens, you will have bars of soap that multi-task as body scrubs.
Instead of the loofah, you can add dried flowers to your soap. Lavender, passionflower, chamomile and eucalyptus all have healing properties and will look gorgeous in your handmade soaps.
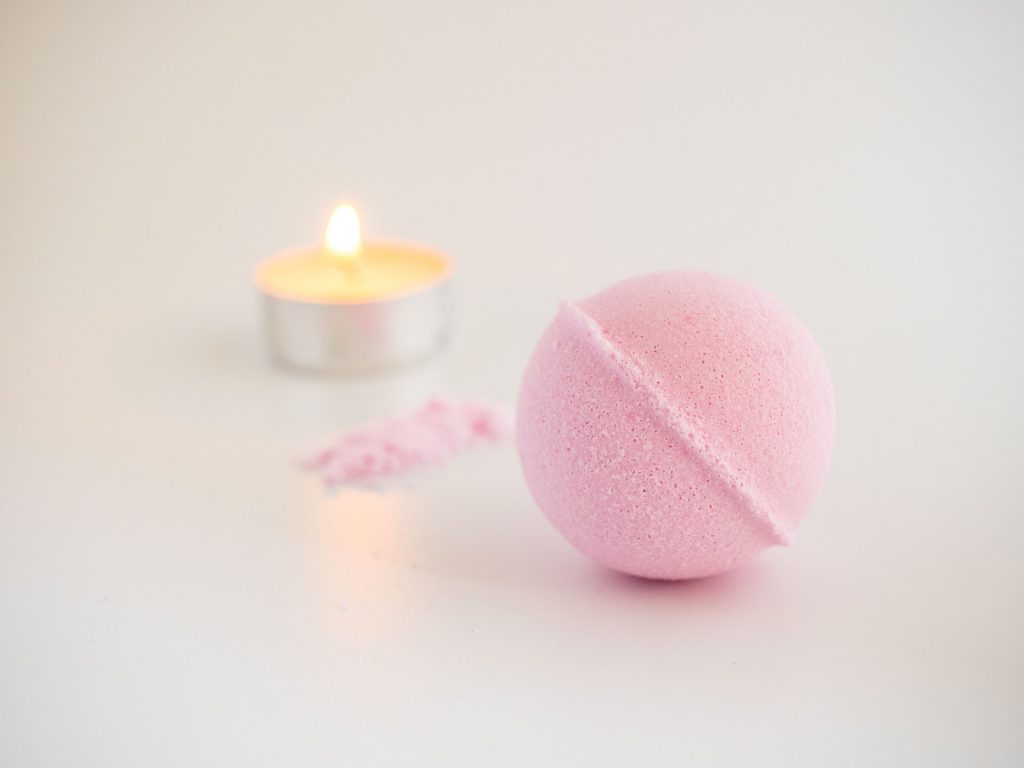
2- Homemade bath bombs
Bath bombs may seem very mysterious, but they are actually quite easy to make at home. Plus, you can make a whole batch of them for what you would pay for just one at a store like Lush.
To make about a dozen bath bombs, you will need:
- 8 ounces of baking soda
- 4 ounces of Epsom salts
- 4 ounces of corn starch
- 4 ounces of citric acid. The word “acid” makes this sound scary to some, but it occurs naturally in all citrus fruits. For example, lemon and lime juice are rich sources of citric acid. You can find it at many supermarkets or online.
- 2.5 ounces of coconut oil, or other oil such as almond or jojoba.
- About 2 teaspoons of the essential oil(s) of your choice.
- 4-6 drops of food coloring, If this is your first time making bath bombs, we recommend starting with a single color.
- Silicon bath bomb molds. You can also use candy/cake molds in any shape you like.
Once you have assembled these items, follow these steps to make your bath bombs:
- First, mix the dry bath bomb ingredients (baking soda, Epsom salt, corn starch, and citric acid) together in a large bowl. Use a whisk to make sure the mixture is clump-free. The baking soda is what makes the magic happen! When the high pH baking soda reacts with the low pH citric acid, it produces carbon dioxide bubbles.
- Mix the wet ingredients thoroughly (oil, essential oil, food coloring) with 1 tablespoon of water. You can play around with different essential oil and color combinations. Some classics are: pink bath bombs with rose oil, green bath bombs with eucalyptus oil or yellow bath bombs scented with vanilla.
- Have your molds ready to go because after the next step, you will have to work fast so they don’t dry out.
- SLOWLY add the liquid to the dry mixture. You have to do this very slowly, or your bath bomb will explode before you even get it in the mold. If it starts to look a little fizzy, slow down. Make sure to constantly whisk the mixture as you go.
- When you are finished, pack the mixture firmly into the molds and let dry for at least a day.
Ideas to enhance your bath bombs
You can add dried flowers or biodegradable glitter to make your bath bombs more luxurious and add a touch of fun. Mix them in with the dry mixture before you start adding the oil and water mixture.
Valentines Day Winter Craft Idea
These bath bombs make the perfect Valentine’s Day gift. Add some dried rose petals for an extra special touch.
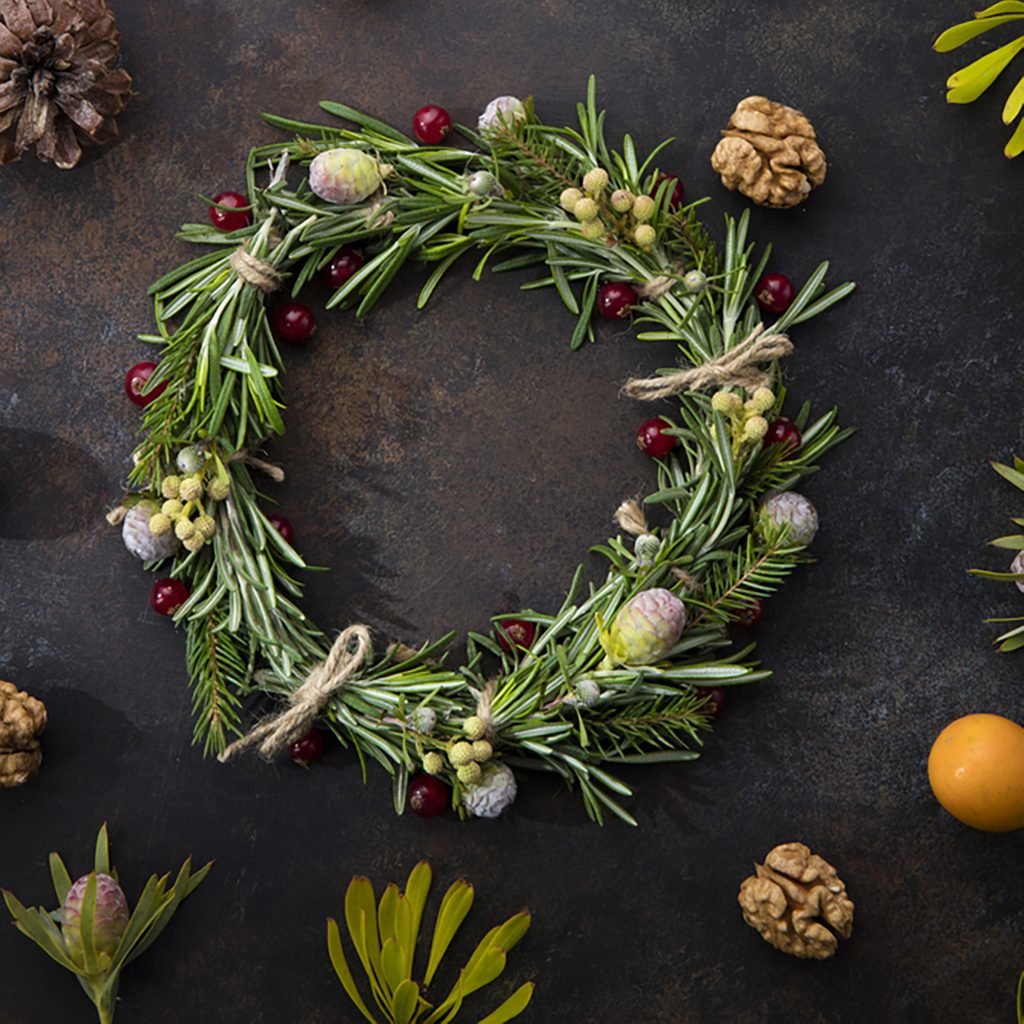
3- Rosemary wreath
Do you love the idea of a wreath but want something less “Christmassy?” How about a rosemary wreath? And don’t worry- wreaths have been used to decorate homes since the days of Ancient Greece. The rosemary in this wreath will give your home a fresh, clean sent that might even motivate you to get a jump start on your spring cleaning.
To make your wreath you will need:
- Rosemary sprigs- you can find them in the grocery store or at a nursery.
- Pine boughs; available at nurseries or you can even collect your own.
- A wreath form; available in craft stores.
- Twine or floral wire
- Fishing wire or a pretty ribbon
Once you have assembled these items, follow these steps to make your wreath:
- Cut the rosemary sprigs and pine boughs into 6-to-8-inch-long pieces. Cluster them into bunches, attaching to the base of the wreath with wire or twine. Do not cut the wire/twine.
- Working in a circular direction, continue adding bundles until you reach the starting point.
- When the entire form is covered, tie off the wire, leaving a few extra inches before cutting the end.
- You can add embellishments such as pine cones, dried citrus slices. A glue gun will come in handy if attaching small embellishments, such as berries.
- Use fishing line to hang your wreath for a seamless, no-show look. Or try raffia and ribbon for a more dramatic effect. A ribbon can bring together all the colors in your wreath.
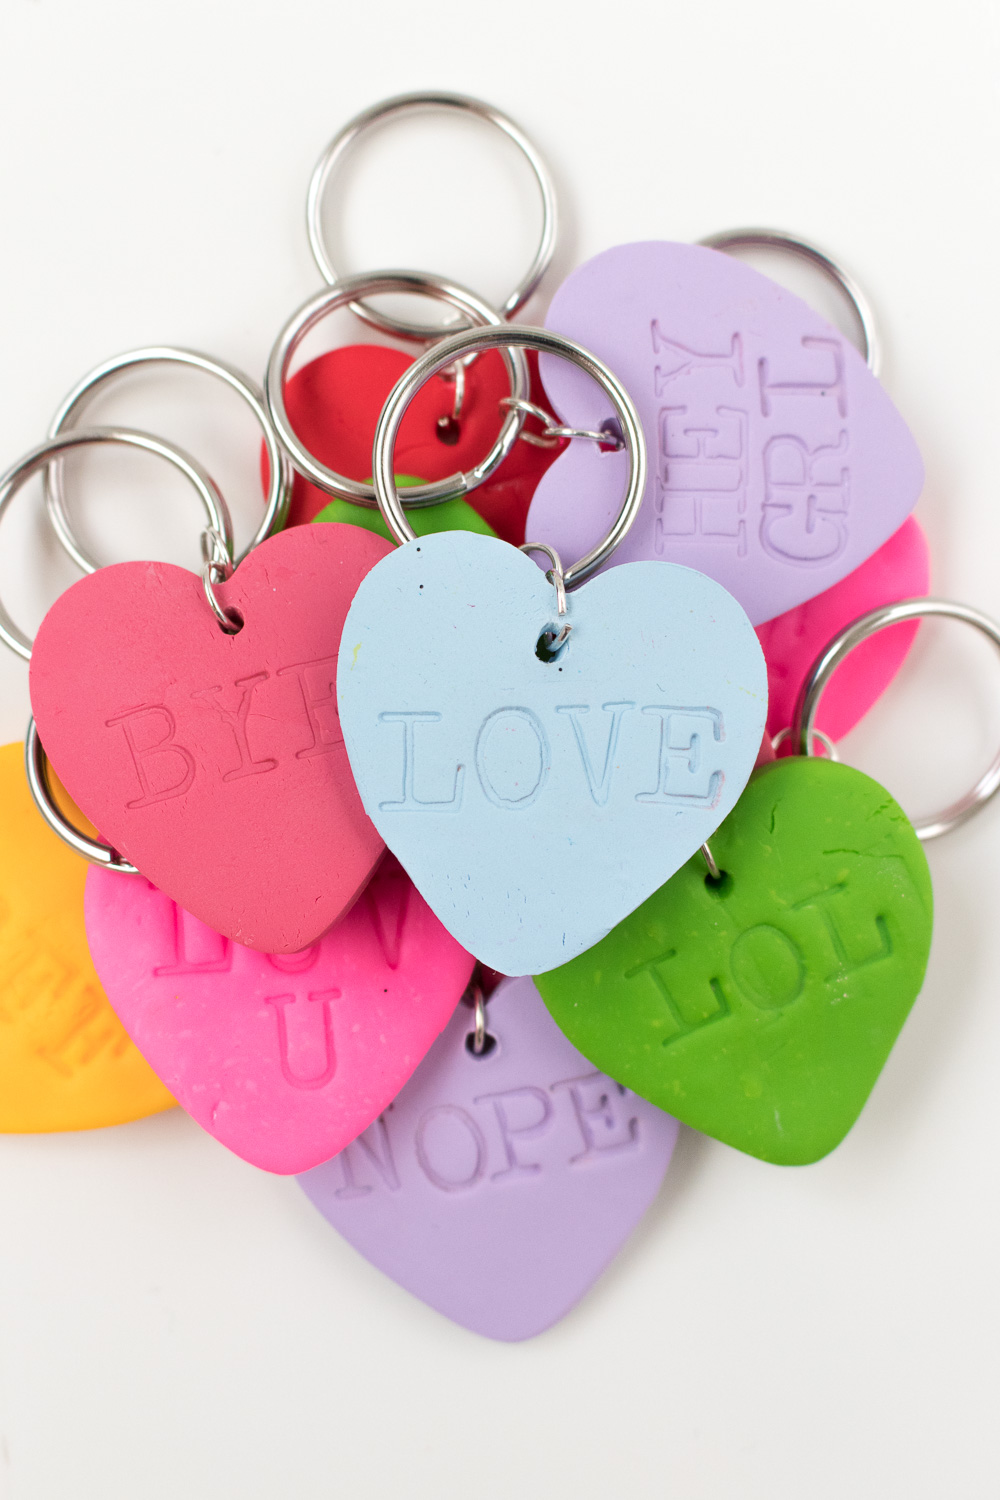
4- Valentine’s heart shaped key rings
Aside from President’s Day and MLK Day, the next holiday is Valentine’s Day. This is a really fun activity you can get started on this month, and give to your friends on Valentine’s Day/Galentine’s Day. Unlike the little pastel heart candies, they have zero calories plus and your friends will think of you every time they take out their keys.
To make the key chains you will need:
- Oven bake clay. Available at craft stores or online.
- A rolling pin
- A heart shaped cookie cutter
- Small alphabet stamps
- Key rings
- Jump rings. These are used in jewelry rings and are available in craft stores.
Once you have assembled these items, follow these steps to make your key rings:
- Roll out the clay to a thickness of one quarter inch. Do this, and the steps 2-6, for each color of clay you are working with.
- Use your cookie cutter to cut out the heart shapes.
- Place the hearts on a cookie sheet lined with parchment paper.
- Use the alphabet stamps to press words like “Love,” “Be Mine” or your friends’ initials.
- Use a toothpick to make holes at the top of each heart. This is important because it is where you will place the key rings.
- Bake the hearts according to the instructions on the oven bake clay box.
- Let sit until they are cool and hardened.
- Attach a jump ring through the holes in the hearts and another to the first jump ring.
- Fix the key ring to the second jump ring.
For more detailed instructions, click here: DIY Embossed Heart Key Chains