Do you want to start a flower or vegetable garden but get overwhelmed? You’re not alone. Gardening is one of those things that seems simple enough, but the more you talk to experts and master gardeners, the trickier it seems.
Think about it . . . if it was that complicated for a plant to grow, the whole earth would be a desert! Remember those bean plants your kids grew in school? Where they simply put a bean in a cup full of dirt, watered it a bit and it sprouted in a few days? Well, gardening really can be that easy. Here is how to start a garden in twelve easy steps:
1. Determine your region’s planting schedule- if you live in the north, say Maine, your gardening schedule is going to be very different than someone who lives in Louisiana. If you’re only interested in planting a vegetable garden, you can go to the Farmer’s Almanac Planting Dates Calculator and search for your city/state. It will tell you exactly which vegetables will grow and when to plant them.
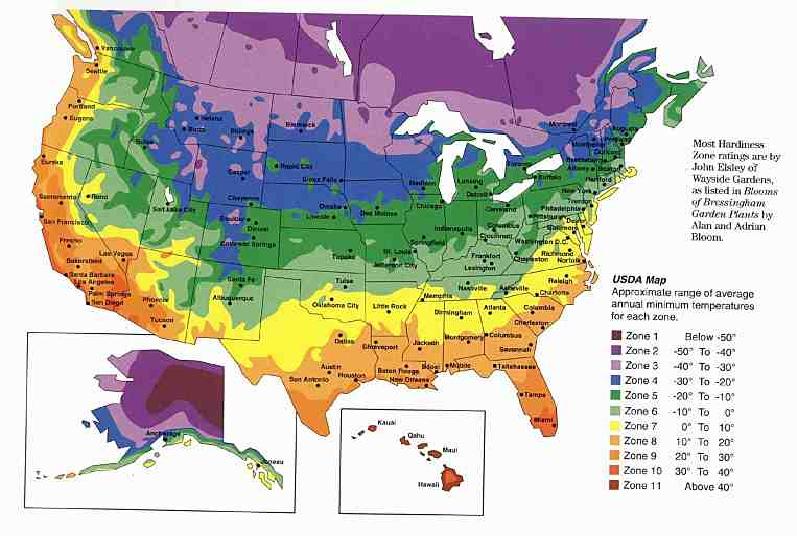
If you’re interested in planting flowers, find your zone on the following map. For example, Middle Tennessee is in Zone 6. Rule of thumb for planting flowers: if you live in a place that has cold winters, you want to plant your annuals (see Point 3 below for more about annuals) after the danger of frost has past. For Middle Tennessee, this is after April 15. If you live in a warm winter climate, plant your annuals in mid spring. Perennials can be planted anytime of year- spring and fall are the best seasons.
 2. Figure out what you want to plant- When starting anything new, we recommend to not go crazy the first time! Perhaps 2-3 kinds of vegetables and 2-3 types of flowers. To choose your vegetables, we recommend typing your location in the Farmer’s Almanac Planting Dates Calculator (see link above) and choosing a few you and your family like. For flowers, we recommend starting with something easy and pretty. Here’s great list of 10 easy perennials you can start with: Ten Perennials Easily Grown from Seed.
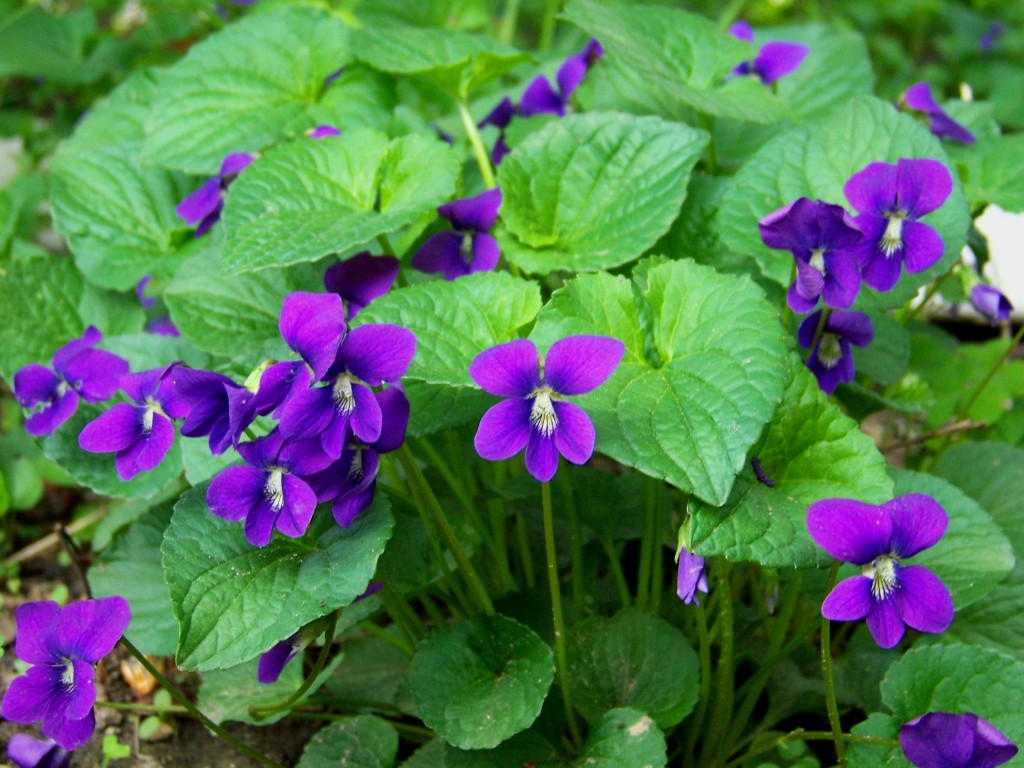
 3. What’s the difference between an annual and a perennial anyway?– Easy . . . annuals bloom and die in one season, perennials bloom more than two seasons, and biennials bloom and die in the second season. If you want instant gratification, we recommend skipping the biennials for now. Annuals are good if you want different colors and varieties each year. Perennials are the lowest maintenance. That said, many annuals “self-seed.” Meaning . . . they drop their pods, capsules or seeds at the end of the season. These plant themselves in the soil and return the following year. The only problem with this is the wind can blow them and you can end up with flowers in unexpected places the following year. Some of the most common examples of self-seeding annuals are violets, columbines, bachelor’s buttons and forget-me-nots.
 4. Decide if you want to start your seeds inside- This requires a bit more work and advance planning. Although more work, it’s also very rewarding. And if you’re reading this blog when it was written, on March 5, you have plenty of time to get started, no matter where in the U.S. you live. The reason to grow flowers from seed, and start early, is that in most places in the U.S. (except tropical areas like Florida), the summers are too short for plants to complete their growing cycles if planted directly into the ground. Wouldn’t it be a pity to plant a bunch of tomatoes and never get to eat a single one? Alternatively, you can buy small plants in late spring from a nursery or Home Depot and plant them directly into the ground. However, this is a much more expensive option and your selection will be much smaller. If you chose this option, you don’t have to do much more until May. If you are using seeds, proceed to Step 5.
5. Go to the store- Here’s your shopping list: seeds (make sure to read the back of any packet you buy- they contain important instructions), containers in which to plant the seeds (see photo below) and seed starting mixture. Seed starting mixture, which usually contains peat and vermiculite, is much better than soil because it is sterile, lightweight and free from weed seeds.
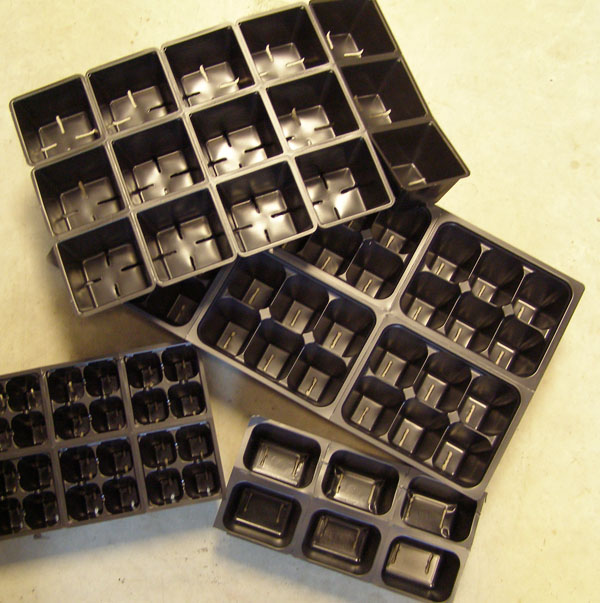 6. Prepare the containers- Place the containers in a tray (to keep them organized and catch the water that drains from them) and fill with the starting mixture. Water them and let the mixture settle. Refill the containers and water again. When the mixture has finished settling they should be almost full.
7. Plant your seeds- All seeds are different so look on the backs of the packages in which they came and follow the instructions. If you are unsure about seeding depth, a rule of thumb is to plant a seed four times as deep as its width. After planting the seeds you can cover with plastic wrap to conserve moisture. However, check them DAILY to make sure they don’t dry out.
8. Find a good location- Ideally it should be warm (80-85 degrees) with “bottom heat.” You can put them on a radiator or on top of the refrigerator. If you have the luxury of a heated floor, put them directly on that. They don’t need light until they sprout.
9. Let them germinate- The most important thing you need to do now is keep them moist. Check them every day and when they need water, mist them gently.
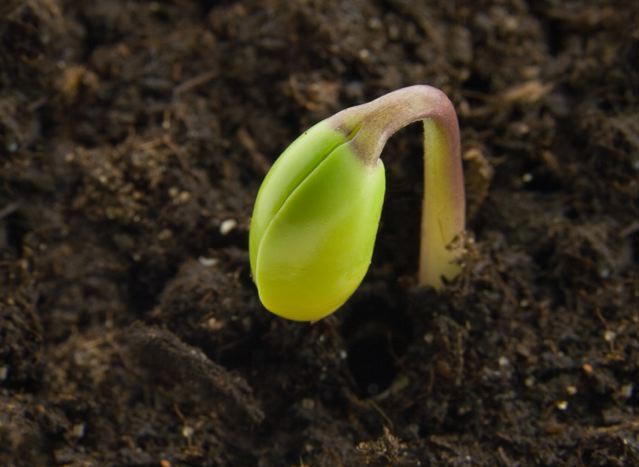 10. Find your seedlings light- As soon as you start to see tiny stems and leaves, uncover them and get them into the light immediately. Traditionally a south facing window is best. If you have fluorescent grow lights even better.
11. Help them grow- The most important thing you can do now is keep them in good light and watered. Now that they’re a little older you can let the top half inch of the soil dry out. Check them daily and if they are dry below that, gently water them. Think spring mist- not late summer afternoon downpour.
12. Put them into bigger pots- When they are two to three inches tall you will need to put them into bigger pots. When you do this, make sure you remove them very carefully from their starter containers (a fork works well) before putting them into larger pots (again using the starter mix). At this point you will need to start fertilizing them once a week.
Once the weather outside is warm enough, you can plant them outside. We’ll write a blog next month with how to do this and other gardening tips. In the meantime, for more tips about maintaining your seedlings, check The River Club’s Facebook page where we will continue to post advice. If you have questions, please comment on this blog or on our Facebook page. Good luck and have fun!
